After almost an entire year in a global pandemic, most of us have found a new love (read: obsession) for sprucing up our homes. One thing that I have come to love is decorating with live plants. (Or fake plants that look real!) The way the added greenery breathes new life into a room is spectacular!
But there is an art to placing plants inside your home.
Not any old plant will work in every room. You have to take into account light, humidity and temperature. But don’t let any of this intimidate you! Most plants are very forgiving and can thrive with the tiniest amount of care. Take it from me, I am a recovering plant killer.
Over the years, through research and trial & error, I have found some great plants that work better than others in certain rooms in your home. Here a few plants that will spruce up, and thrive in, your kitchen, plus some care tips!
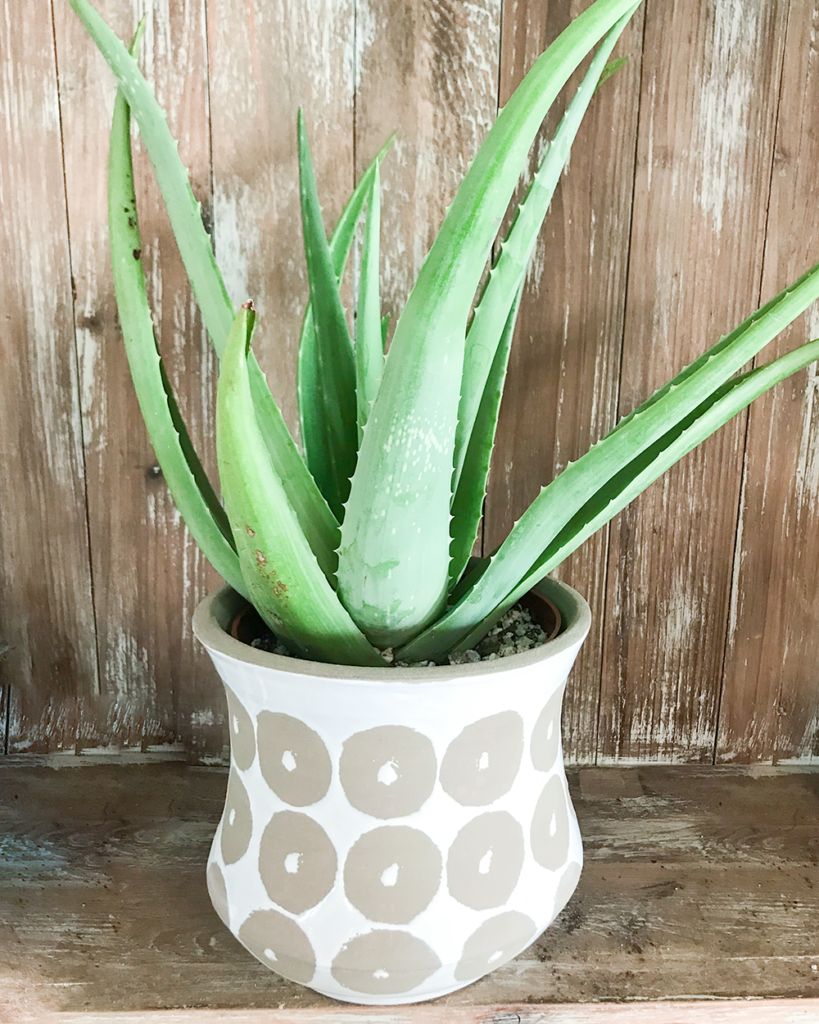
Aloe Vera
Having an aloe vera plant in your home is essential, in my opinion. First, because they bring a subtle boho, desert look to your decor that is very trendy right now. But more importantly, the gel inside of the aloe vera plant’s leaves can be used as a skin salve for burns. (Side note: some people’s skin can be irritated by aloe vera gel, so be sure to test that out before adding it to a burn!)
There are hundreds of varieties of aloe vera plants, but the most common one is Aloe Barbadensis. This is the kind that you will most likely find at your local greenhouse.
How to Care for your Aloe Vera Plant
Light – Aloe vera plants need bright light to survive, but don’t place them in direct sunlight as their leaves will burn and your plant will end up looking scraggly.
Soil – Aloe vera plants require sandy or gravelly soil that is similar to their original desert climate. This is the soil that I use to pot my aloe vera plant. You can also use the potting mix that you use for succulents & cacti as they are well draining, which the aloe vera plant requires.
Water – Allow the top third of the soil to dry before watering. Even though aloe vera plants can withstand drought like conditions, they prefer to be watered on a regular basis.
Signs of underwatering – leaves will shrivel and pucker slightly.
Signs of overwatering – brown droopy leaves and soft spots.
Fertilizer – Your aloe vera plant only needs fertilized once each year, preferably in the spring. This fertilizer works great for all indoor plants!
Repotting – The root of an aloe vera plant actually spreads close to the surface instead of growing down. When repotting, make sure to choose a wider pot rather than a deeper one.
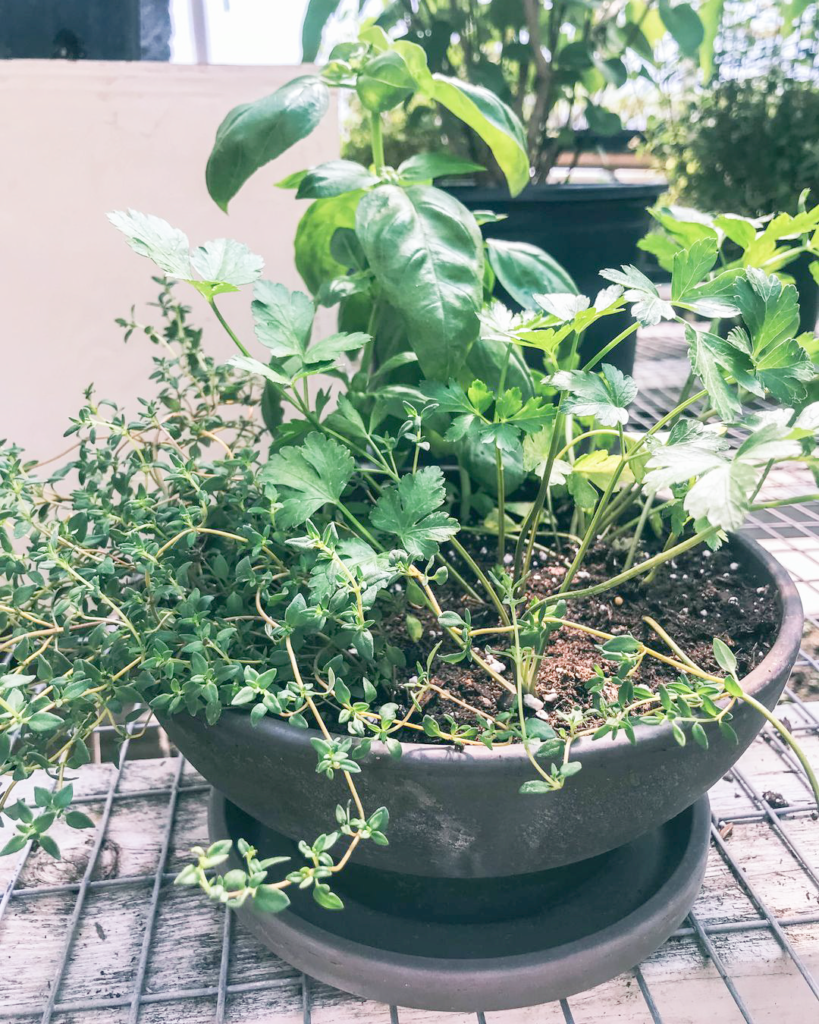
Fresh Herb Plants in your Kitchen
It is my dream to have an entire windowsill filled with fresh herbs in my kitchen so that I can just snip off what I need as I cook. In the past, I have not been able to keep herbs alive inside.
This was because I was putting them in the wrong place.
Most herbs need a lot of sun to survive indoors. If your kitchen isn’t sunny, like mine, then you will need to get a growing lamp to help your herbs thrive.
Choosing & Caring for your Potted Herbs
Choosing your herbs – There is no right or wrong answer to what herbs you should grow in your kitchen herb garden. Choose herbs that you cook with or use on a regular basis. For me this is: cilantro, basil, mint and chives.
Light – Most herbs need 4-6 hours of direct sunlight to thrive. If your kitchen doesn’t get that much sunlight, then you will need a grow lamp.
Soil – Any type of potting mix is fine for herbs. Make sure you choose a pot that allows for growth of your herbs.
Water – Water your herbs regularly, never allow the soil to dry completely. Make sure to turn your pots every time you water so that each side gets ample sun.
Signs of underwatering – Wilted, brown leaves that eventually turn “crispy.”
Signs of overwatering – Leaves yellow & fall or turn a black color. Fuzzy mildew or breaking stems.
Fertilizer – Because your potted herbs are not receiving nutrients from the ground, you will need to fertilize them during their growin season. Check out this post from The Spruce for a detailed process to fertilizing your herbs.
Pruning – Herbs need pruning regularly. This helps promote new growth and a healthy plant. Be sure to never let your herbs flower or seed as this will change the taste of the herbs.

ZZ Plant
Does your kitchen receive little to no sun? Don’t worry, you can still have live plants! The ZZ plant tolerates low light and does not require a ton of water. This plant is a great option for beginner plant lovers.
The beautiful shiny leaves add a great texture to your kitchen decor! Plus, watching new leaves sprout from their bulbous stalks is extremely enjoyable.
Another added benefit of the ZZ plant is that it is a natural air purifier for your kitchen.
*ZZ plants are poisonous if ingested. Keep out of reach of small children and pets.
How to Care for your ZZ Plant
Light – ZZ plants do best in medium to low indirect light. Never place your ZZ plant in direct sunlight.
Soil – Regular, well-draining potting soil is fine for your ZZ plant.
Water – ZZ plants require very little maintenance and only need to be watered every 2-3 weeks. Allow the soil to dry out before watering.
Signs of underwatering – Wilting plant or wrinkly leaves.
Signs of overwatering – Brown or yellow mushy leaves or stalks.
Fertilizer – ZZ plants do not need to be fertilized.
Repotting – You can repot your plant once a year as needed.
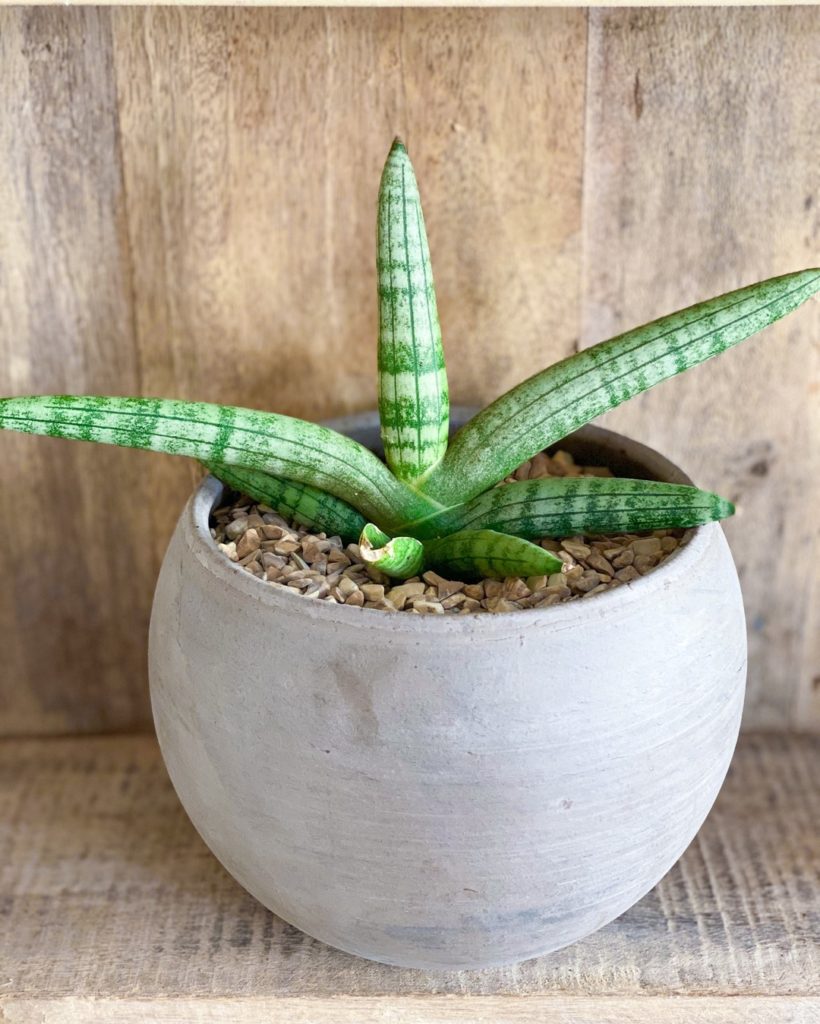
Cylindrical Snake Plant
The cylindrical snake plant offers a unique design to your plant decor and it comes in a variety of shapes. A couple favorites are the starfish (pictured) and braided option.
This quirky plant features subtle stripes and thick cylindar leaves. It is a type of succulent that can thrive in any light conditions, which makes it a great option for your kitchen.
*Cylindrical snake plants are poisonous if ingested. Keep out of reach of small children and pets.
How to care for your Cylindrical Snake Plant
Light – Thrives in medium light conditions, but can tolerate almost any light conditions. If it receives too much sun, the leaves will start to turn yellow. If you notice your plant has stopped growing, then it is not receiving enough sun.
Soil – This is a succulent so it loves sandy, well drained soil. Use a potting mix specifically for succulents, like this one.
Water – Allow the soil to dry out completely between watering. Typically every 2-3 weeks.
Signs of underwatering – Wrinkly or drooping leaves, brown leaf tips or dry leaf edges.
Signs of overwatering – Soggy or yellowing leaves, brown spots or dropping leaves.
Fertilizer – Fertilize your cylindrical snake plant monthly using a succulent specific fertilizer. However, you will want to dilute the fertilizer to half the strength as it doesn’t require that much. Do not fertilize during the winter.
Repotting – The cylindrical snake plant only needs repotted once the plant is noticeably outgrowing its pot. This occurs every few years.
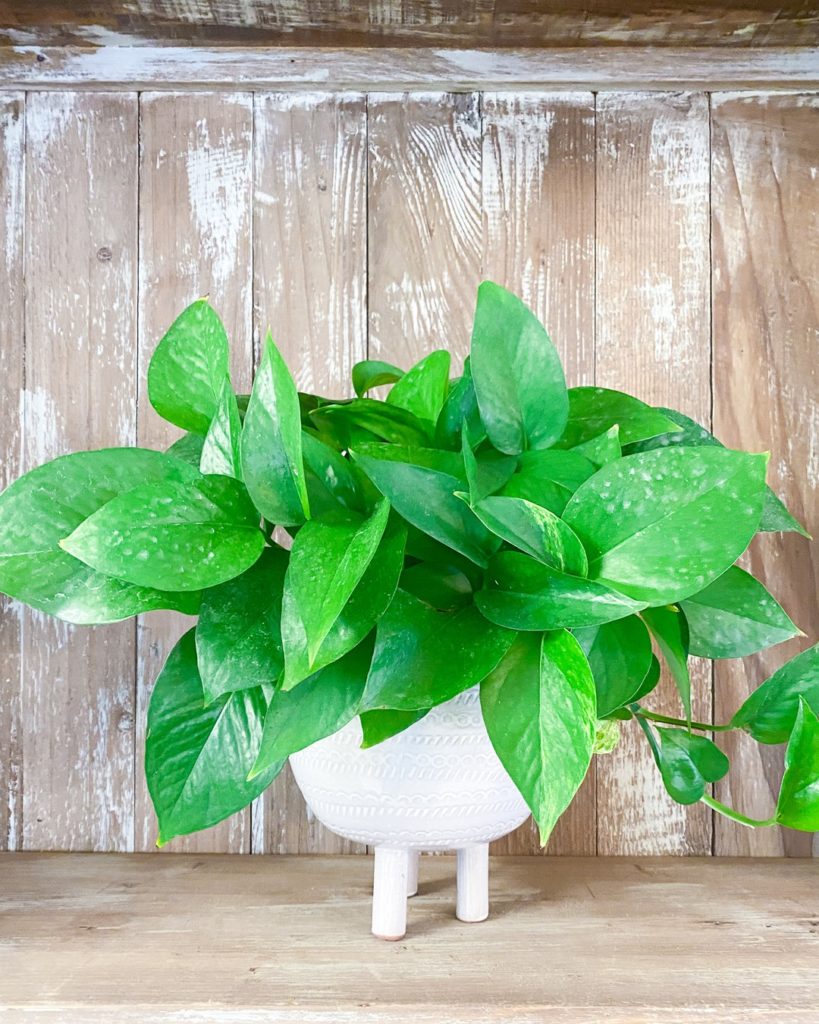
Pothos Plant
Look no further for the perfectly elegant trailing vine plant for your kitchen. Especially if you have open shelves for one of these beauties to sit on.
For optimal effect, stack some cookbooks on a shelf and use your pothos plant as a bookend.
Pothos plants are notoriously low-maintenance and have great air purifying qualities. This makes them great plants for first time plant owners too!
Pothos comes in many varieties so you have plenty of great options!
*Pothos plants contain skin irritating sap. Keep out of reach of small children and pets.
How to care for your Pothos Plant
Light – Thrives in bright, indirect light but will still do well any low to medium light. Do not place in direct sunlight.
Soil – Regular well draining soil is ideal for this plant.
Water – Water your pothos plant every 1-2 weeks allowing the soil dry out between watering. If soil remains constantly wet the plant’s roots will start to rot.
Signs of underwatering – Wilting leaves.
Signs of overwatering – Yellowing leaves or black stems.
Fertilizer – Because the nutrients in potting soil does not last forever, you should fertilize your pothos plant every other month during the growing season (spring through fall) with a regular water soluble houseplant fertilizer.
Repotting – If you notice that the leaves of your pothos plant are falling off even though you are caring for it correctly, it is time to repot your plant. This happens when the roots have outgrown its pot, so be sure to repot your pothos in a pot 1-2 sizes bigger.
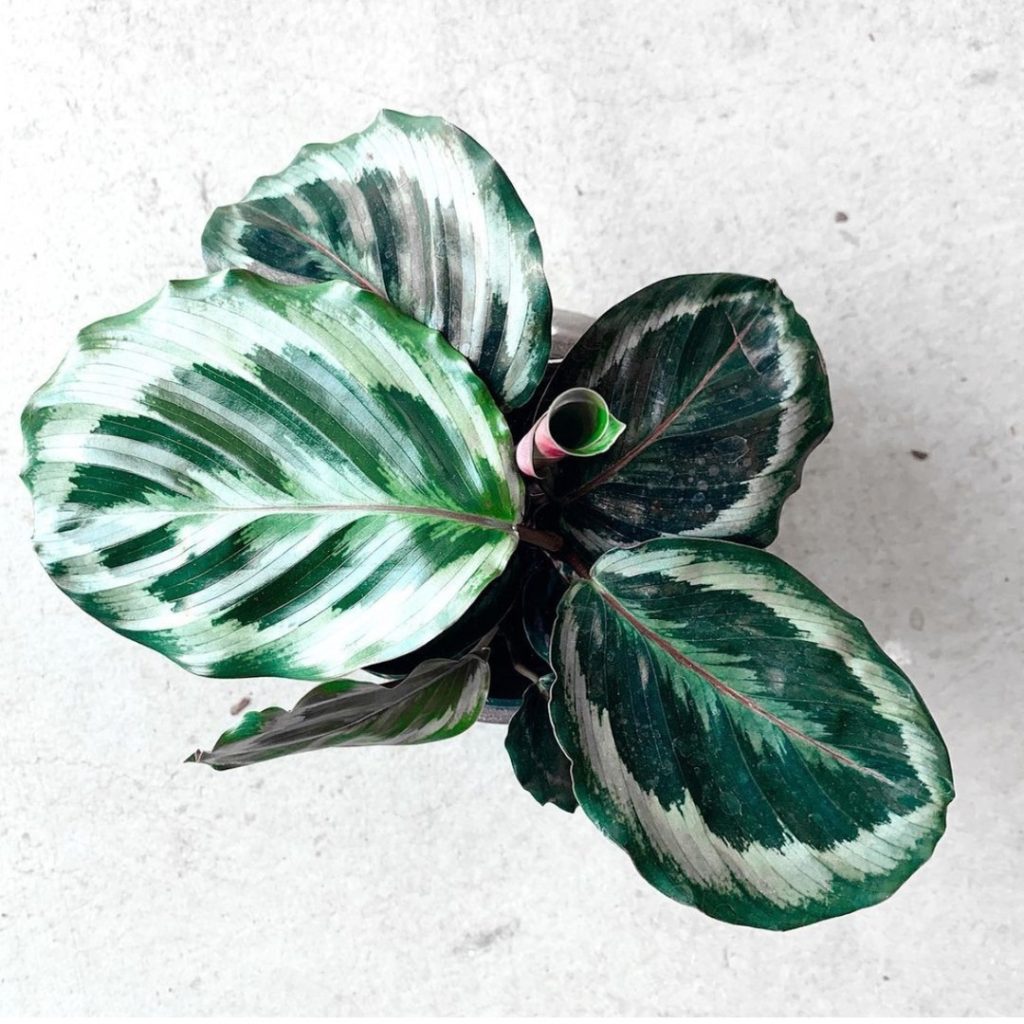
Calathea
Calatheas are definitely the most finicky of the plants listed on this post, but it is also one of the most beautiful plants that you can have in your home.
In my opinion, it’s well worth the effort in keeping it alive. Calatheas come in many varieties like the prayer plant (the most popular), trio star, calathea medallion (pictured) and beauty star.
The key to keeping your calathea plant happy is meticulous care. So I recommend keeping it in an area that you frequent so you can keep a close eye on it when it starts to show signs of distress.
Just a reminder, plants are forgiving so don’t give up on them!
How to Care for your Calathea Plant
Light – Thrives in medium to bright indirect light, but can tolerate low indirect light. Rule of thumb, the darker the leaves are then the lower amount of light the plant needs. Never place in direct sunlight.
Soil – Calatheas do best in soil that is well draining but still retains water. This handmade soil from Etsy has rave reviews!
Water – Water every 1-2 weeks, allowing soil to dry out half way down between waterings. Never let the soil dry out completely though. Expect to water more often in brighter light and less often in lower light.
Signs of underwatering – Wilting or curling leaves.
Signs of overwatering – Yellow leaves or black stems.
Humidity – Calathea plants love humidity. I always run a humidifier during the winter due to the dry Nebraska weather. Or you can place your plant on a tray filled with water & pebbles. The natural evaporation of the water will help keep the air around your plant moist.
Fertilizer – Fertilize your calathea once a month with a regular indoor plant fertilizer during the growing season. Do not fertilize in the winter.
Repotting – You can repot your calathea once every spring to refresh the soil nutrients as well as transfer to a larger pot if needed.
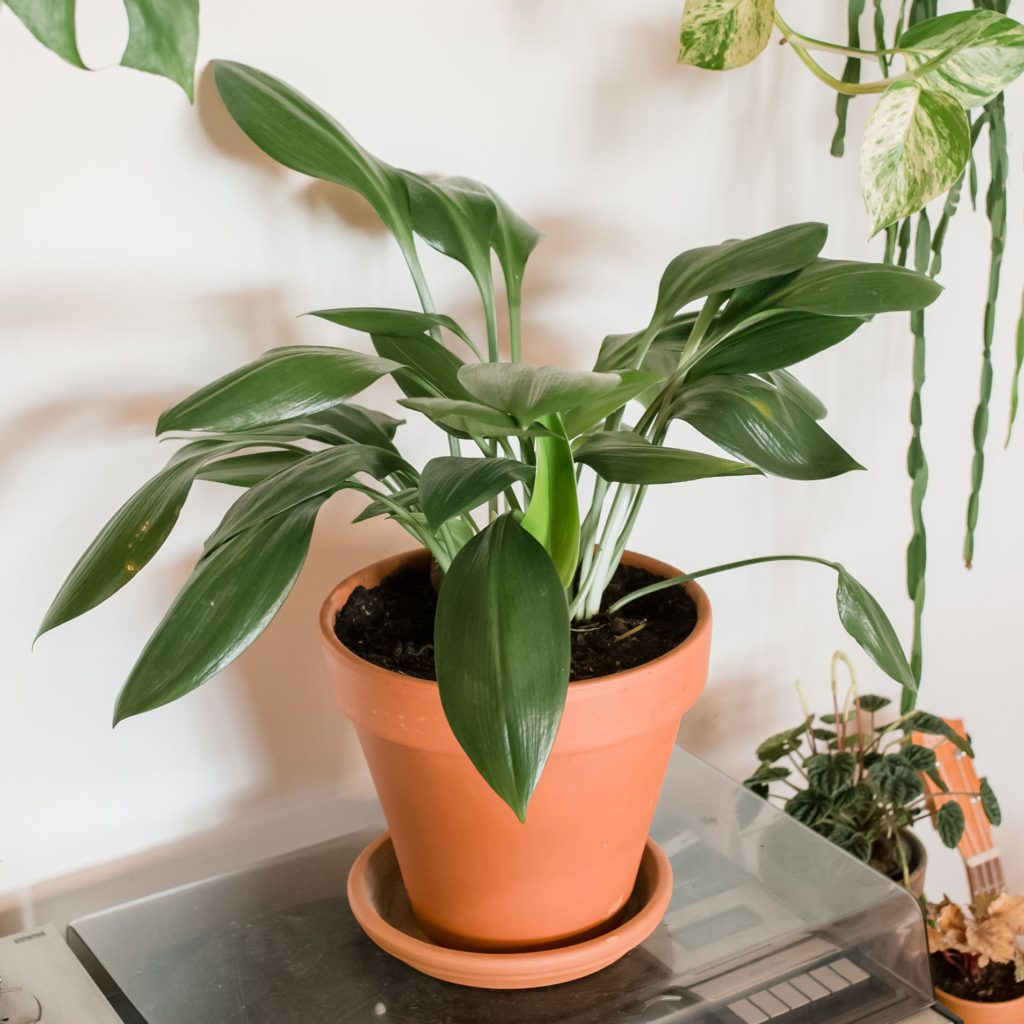
Cast Iron Plant
The cast iron plant gets its name from being nearly indestructible as a houseplant. So if you have been hesitant to start a plant collection due to your “black thumb”, I recommend starting with this plant.
Although I definitely don’t recommend this, the cast iron plant can withstand a lot of neglect and practically any light condition. Also, it will tolerate fluctuating temperatures like that of a kitchen atmosphere due to cooking.
Image courtesy of thespruce.com.
How to Care for your Cast Iron Plant
Light – Cast iron plants will tolerate any light conditions. Avoid direct sunlight as this will burn the cast iron plant’s leaves.
Soil – Any regular well draining potting soil is fine.
Water – Cast iron plants are drought tolerant so be careful not to overwater them. Allow the soil to dry out before watering again. Every 1-2 weeks depending on the season.
Signs of underwatering – Brown tips.
Signs of overwatering – Brown tips and yellowing, mushy leaves.
Humidity – Cast iron plants are not picky when it comes to humidity.
Fertilizer – With or without fertilizer, the cast iron plant is a slow grower. It is recommended to fertilize your plant every month in spring and summer with an all purpose fertilizer. Always apply fertilizer after watering so the roots do not get burned.
Repotting – You can repot your cast iron plant every other year as needed. For best results, repot your plant in the spring.
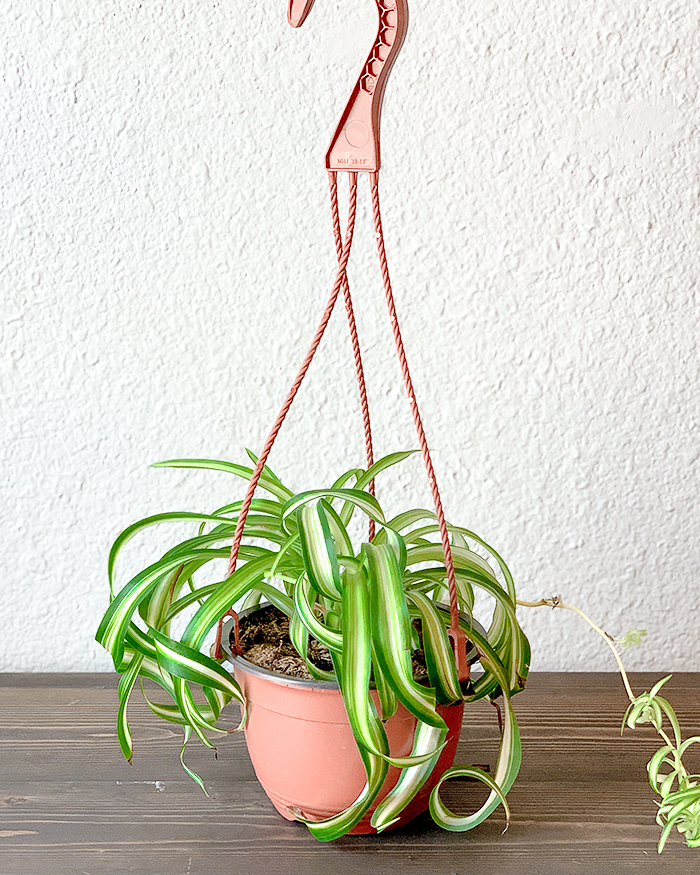
Spider Plant
Spider plants are a great hanging plant option for your kitchen with their arching leaves creating a beautiful statement. They are extremely hardy so don’t worry if your kitchen provides less than ideal conditions.
The best part about this plant is its air purifying qualities.
Spider plants commonly have striped leaves, but they do come in solid green as well. Their tight rosettes and hanging plantlets create a stunning trailing effect for all to enjoy!
How to Care for your Spider Plant
Light – Spider plants prefer bright, indirect light, but they will do fine in any light situation.
Soil – Any regular well drained potting soil is fine.
Water – Water your spider plant once a week. Soil should be slightly dry to the touch before watering again.
Signs of underwatering – Brown leaf tips.
Signs of overwatering – Brown leaf tips.
Humidity – Spider plants will do fine in low humididty environments, but they will thrive in high humidity. If your kitchen has low humidity, be sure to mist the leaves every few days as needed.
Fertilizer – Fertilize your spider plant every 2-3 weeks during the growing season with a regular houseplant fertilizer.
Repotting – Spider plants do not need to be repotted yearly. When you do repot your plant, do it in the spring.
Here are a few great hanging basket options:
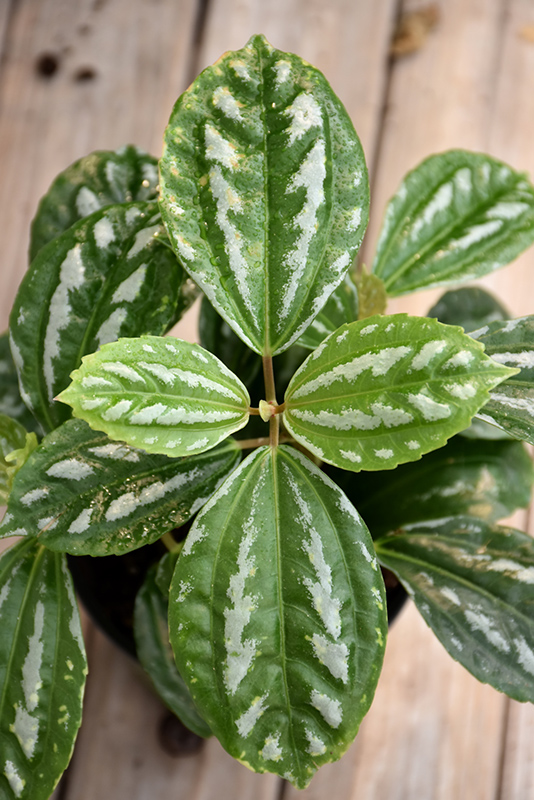
Aluminum Plant
Having an aluminum plant in your kitchen is very aesthetically pleasing if you have silver appliances. The silvery accents on the aluminum plant’s leaves will really grab your eye.
Even though these plants are easy to please, they do not like drafts, so be sure to keep it away from your heater, air conditioner and stove.
*Aluminum plants are poisonous if ingested. Keep out of reach of pets.
Photo courtesy of Stein’s Garden & Home.
How to Care for your Aluminum Plant
Light – Aluminum plants need at least 4 hours of bright, indirect sunlight each day to thrive. Do not place in direct sunlight as this will burn the aluminum plant’s leaves. Can tolerate low light conditions.
Soil – This plant does best with a somewhat sandy potting soil. For best results, pot with a soil that contains perlite like this one.
Water – For best results, check the moisture in your soil every few days. The soil should remain moist but not wet. Water as soon as the top layer of soil starts to dry out. During the winter months, you won’t need to water as much.
Signs of underwatering – Wilting.
Signs of overwatering – Yellowing leaves.
Humidity – Even though the aluminum plant will tolerate normal household humidity, it prefers high humidity. If your home is on the drier side, spritz your plant with water every so often or place your pot on a tray filled with water & pebbles.
Fertilizer – You can fertilize your aluminum plant with a water-based fertilizer once a month during the growing season. You do not need to fertilize during the winter.
Repotting – You can repot your aluminum plant once a year as the roots outgrow its pot.


